Accessing your Raspberry Pi remotely from behind a router can seem daunting, but it's a straightforward process when done correctly. Whether you're a beginner or an advanced user, understanding how to set up remote access for your Raspberry Pi is essential for maximizing its potential. This guide will walk you through the steps to achieve seamless remote connectivity, ensuring your device remains secure and accessible.
In today's interconnected world, remote access to devices like the Raspberry Pi has become indispensable. From running servers to controlling IoT devices, the Raspberry Pi offers endless possibilities. However, accessing it from outside your local network requires specific configurations to bypass your router's firewall and security settings.
This article will provide a step-by-step tutorial on how to use access Raspberry Pi behind router, ensuring you can manage your device from anywhere in the world. We'll cover essential topics like port forwarding, setting up a static IP address, and using SSH for secure connections. Let's dive in!
Read also:Spiderman Tutorial Sophie Rain Your Ultimate Guide To Creating Stunning Art
Table of Contents
- Introduction to Raspberry Pi
- Why Remote Access Matters
- Preparing Your Raspberry Pi
- Configuring Your Router
- Setting Up a Static IP Address
- Port Forwarding
- Enabling SSH
- Using Dynamic DNS
- Securing Your Connection
- Troubleshooting Tips
Introduction to Raspberry Pi
The Raspberry Pi is a versatile single-board computer that has revolutionized the way people interact with technology. Initially designed as an educational tool, it has grown into a powerful platform for various applications, including home automation, media centers, and web servers.
Understanding the basics of Raspberry Pi is crucial before attempting to configure remote access. Key features include:
- Compact size and affordability
- Multiple GPIO pins for hardware interfacing
- Support for various operating systems
- Extensive community support and resources
For this guide, we assume you have a Raspberry Pi with Raspbian (or any compatible OS) installed and basic networking knowledge.
Why Remote Access Matters
Remote access allows you to manage your Raspberry Pi without being physically present. This capability is invaluable for:
- Monitoring and controlling IoT devices
- Managing servers or databases
- Accessing files and applications
- Providing tech support remotely
By learning how to use access Raspberry Pi behind router, you can unlock its full potential and streamline your workflow.
Preparing Your Raspberry Pi
Updating Your System
Before proceeding, ensure your Raspberry Pi is up to date. Run the following commands in the terminal:
Read also:Bryant Hvac Systems A Comprehensive Guide To Reliable Climate Control Solutions
sudo apt update
sudo apt upgrade
This step ensures compatibility and resolves potential issues during configuration.
Checking Network Connectivity
Verify your Raspberry Pi's network connection by pinging an external server:
ping google.com
A successful response indicates proper network setup.
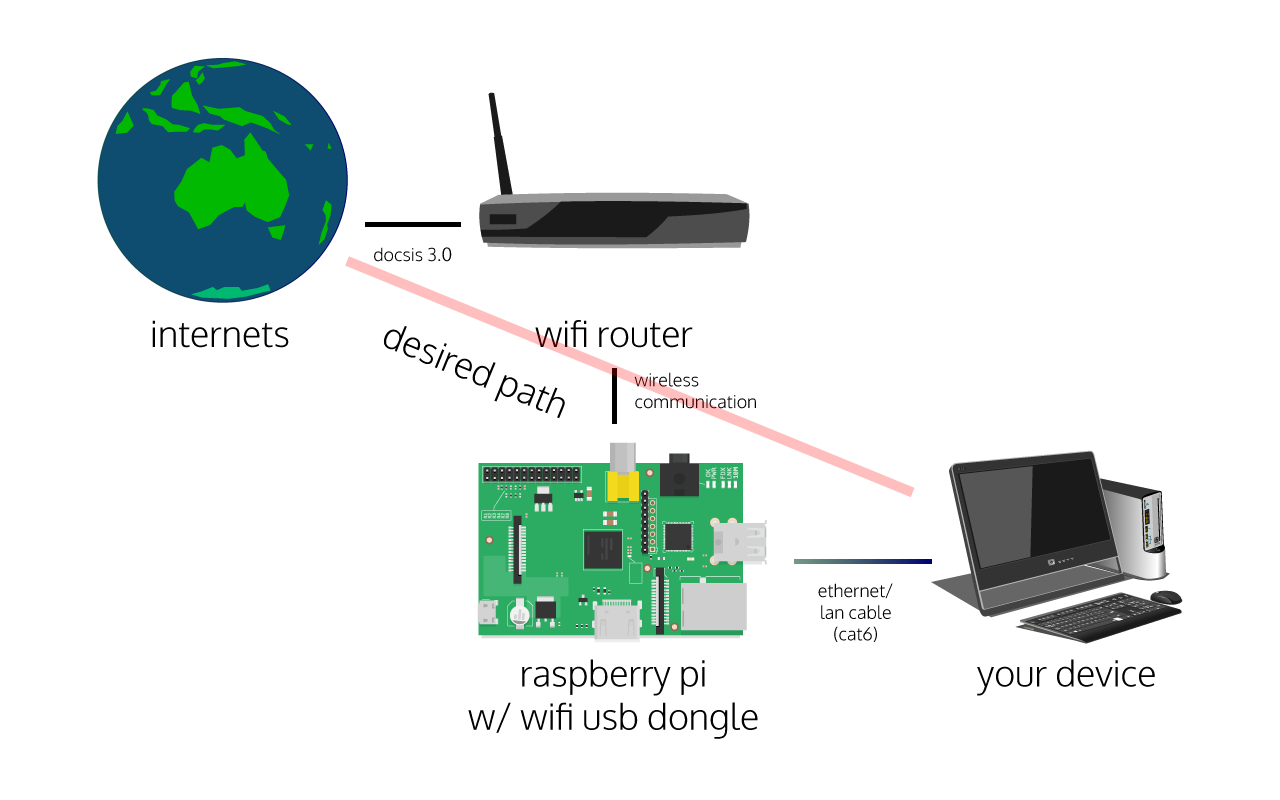
Configuring Your Router
Your router acts as a gateway between your local network and the internet. Configuring it correctly is essential for accessing your Raspberry Pi remotely.
Accessing Router Settings
Log in to your router's admin interface using its IP address (commonly 192.168.0.1 or 192.168.1.1). Refer to your router's manual for login credentials.
Identifying Your Router Model
Different routers have varying interfaces and features. Knowing your router's model helps locate specific settings like port forwarding and DMZ.
Setting Up a Static IP Address
A static IP address ensures your Raspberry Pi retains the same local IP, making it easier to configure remote access.
Follow these steps:
- Open the terminal on your Raspberry Pi.
- Edit the dhcpcd configuration file:
sudo nano /etc/dhcpcd.conf
- Add the following lines at the end:
interface eth0
static ip_address=192.168.1.100/24
static routers=192.168.1.1
static domain_name_servers=192.168.1.1
Replace the IP address with your preferred static address.
Port Forwarding
Port forwarding directs incoming traffic from the internet to your Raspberry Pi. SSH typically uses port 22, but you can change it for added security.
Steps to Configure Port Forwarding
- Log in to your router's admin interface.
- Navigate to the port forwarding or virtual server section.
- Add a new rule with the following details:
- Service port: 22 (or your chosen port)
- Private IP: Your Raspberry Pi's static IP
- Private port: 22
Save the settings and restart your router if necessary.
Enabling SSH
SSH (Secure Shell) allows secure remote access to your Raspberry Pi. Enable it by running:
sudo raspi-config
Navigate to "Interfacing Options"> "SSH"> "Enable". Alternatively, create an empty file named "ssh" in the boot partition.
Using Dynamic DNS
Your home IP address may change periodically, making it difficult to access your Raspberry Pi remotely. Dynamic DNS services like No-IP or DuckDNS provide a static domain name linked to your changing IP.
Setting Up DuckDNS
- Create an account at DuckDNS.
- Install the DuckDNS client on your Raspberry Pi:
sudo apt install curl
curl https://www.duckdns.org/install.sh | bash
Follow the prompts to complete the setup.
Securing Your Connection
Security is paramount when accessing your Raspberry Pi remotely. Implement the following best practices:
- Change the default SSH port to a non-standard value.
- Use strong, unique passwords or SSH keys for authentication.
- Enable a firewall to restrict unauthorized access.
- Regularly update your system and software.
Consider using tools like Fail2Ban to block malicious login attempts.
Troubleshooting Tips
Encountering issues during setup is common. Here are some troubleshooting tips:
- Verify your Raspberry Pi's IP address and ensure it matches the router's settings.
- Check if port forwarding rules are correctly applied.
- Test SSH connectivity locally before attempting remote access.
- Consult your router's documentation for specific configuration details.
If problems persist, consider seeking assistance from online forums or communities.
Conclusion
Learning how to use access Raspberry Pi behind router opens up a world of possibilities for remote management and automation. By following the steps outlined in this guide, you can configure secure and reliable remote access for your device.
We encourage you to share your experiences or ask questions in the comments below. For more tutorials and tips, explore our other articles. Stay connected and keep innovating with your Raspberry Pi!