RemoteIoT VPC SSH Raspberry Pi has become a pivotal topic in the tech world, especially for those interested in remote access and secure network management. As more businesses and individuals adopt IoT solutions, understanding how to configure and secure a Virtual Private Cloud (VPC) with SSH on a Raspberry Pi is crucial. This guide will walk you through the process step-by-step, ensuring you gain the expertise needed to implement this setup effectively.
Imagine being able to access your IoT devices remotely, securely, and efficiently. Whether you're managing a home automation system or a large-scale industrial IoT network, having a robust setup is essential. RemoteIoT VPC SSH Raspberry Pi allows you to achieve just that, providing a secure and scalable solution for remote access.
This article is designed for tech enthusiasts, hobbyists, and professionals who want to enhance their knowledge of IoT and cloud networking. By the end of this guide, you'll have a comprehensive understanding of how to configure a VPC, set up SSH, and integrate it with your Raspberry Pi for seamless remote access.
Read also:Cory Weissman Net Worth A Comprehensive Guide To His Wealth Career And Lifestyle
Table of Contents
- Introduction to RemoteIoT VPC SSH Raspberry Pi
- Understanding VPC
- What is SSH?
- Raspberry Pi Overview
- Setting Up a VPC
- Configuring SSH on Raspberry Pi
- Integrating VPC with Raspberry Pi
- Securing Your RemoteIoT Setup
- Troubleshooting Common Issues
- Conclusion and Next Steps
Introduction to RemoteIoT VPC SSH Raspberry Pi
RemoteIoT VPC SSH Raspberry Pi is a powerful combination of technologies that enables secure and efficient remote access to IoT devices. In this section, we'll explore the basics of each component and why they are essential for modern IoT solutions.
RemoteIoT refers to the ability to manage and interact with IoT devices from a remote location. This capability is critical for maintaining and troubleshooting IoT networks without physical access.
A VPC (Virtual Private Cloud) provides a secure and isolated environment for your IoT devices, ensuring that only authorized users can access them. Meanwhile, SSH (Secure Shell) is a protocol that allows you to securely connect to your devices over the internet. Finally, the Raspberry Pi serves as a versatile and cost-effective platform for deploying IoT solutions.
Understanding VPC
What is a VPC?
A VPC is a virtual network dedicated to your AWS environment, enabling you to launch AWS resources in a logically isolated section of the cloud. It enhances security and control over your network configuration.
Benefits of Using a VPC
- Increased security through network isolation.
- Customizable IP address ranges and subnets.
- Flexible routing and access control.
What is SSH?
SSH, or Secure Shell, is a cryptographic network protocol that facilitates secure communication between devices over an unsecured network. It is widely used for remote administration and file transfer.
Key Features of SSH
- Encryption of data during transmission.
- Authentication mechanisms to ensure secure access.
- Support for various encryption algorithms.
Raspberry Pi Overview
The Raspberry Pi is a series of small single-board computers developed by the Raspberry Pi Foundation. It is popular among hobbyists, educators, and professionals for its affordability, versatility, and ease of use.
Read also:Jennifer Grant Today The Remarkable Journey Of A Celebrated Figure
Why Use Raspberry Pi for IoT?
- Low cost and energy-efficient.
- Wide range of supported operating systems and software.
- Extensive community support and resources.
Setting Up a VPC
Setting up a VPC involves several steps, including defining your IP address range, creating subnets, and configuring security groups. Below is a step-by-step guide:
Step 1: Define Your IP Address Range
Choose a private IP address range for your VPC. Common ranges include 10.0.0.0/16, 172.16.0.0/12, and 192.168.0.0/16.
Step 2: Create Subnets
Divide your VPC into subnets to organize your resources. Ensure that each subnet is associated with the appropriate availability zone.
Step 3: Configure Security Groups
Set up security groups to define inbound and outbound traffic rules. This ensures that only authorized traffic can access your VPC.
Configuring SSH on Raspberry Pi
Configuring SSH on your Raspberry Pi is a straightforward process. Follow these steps to enable and secure SSH:
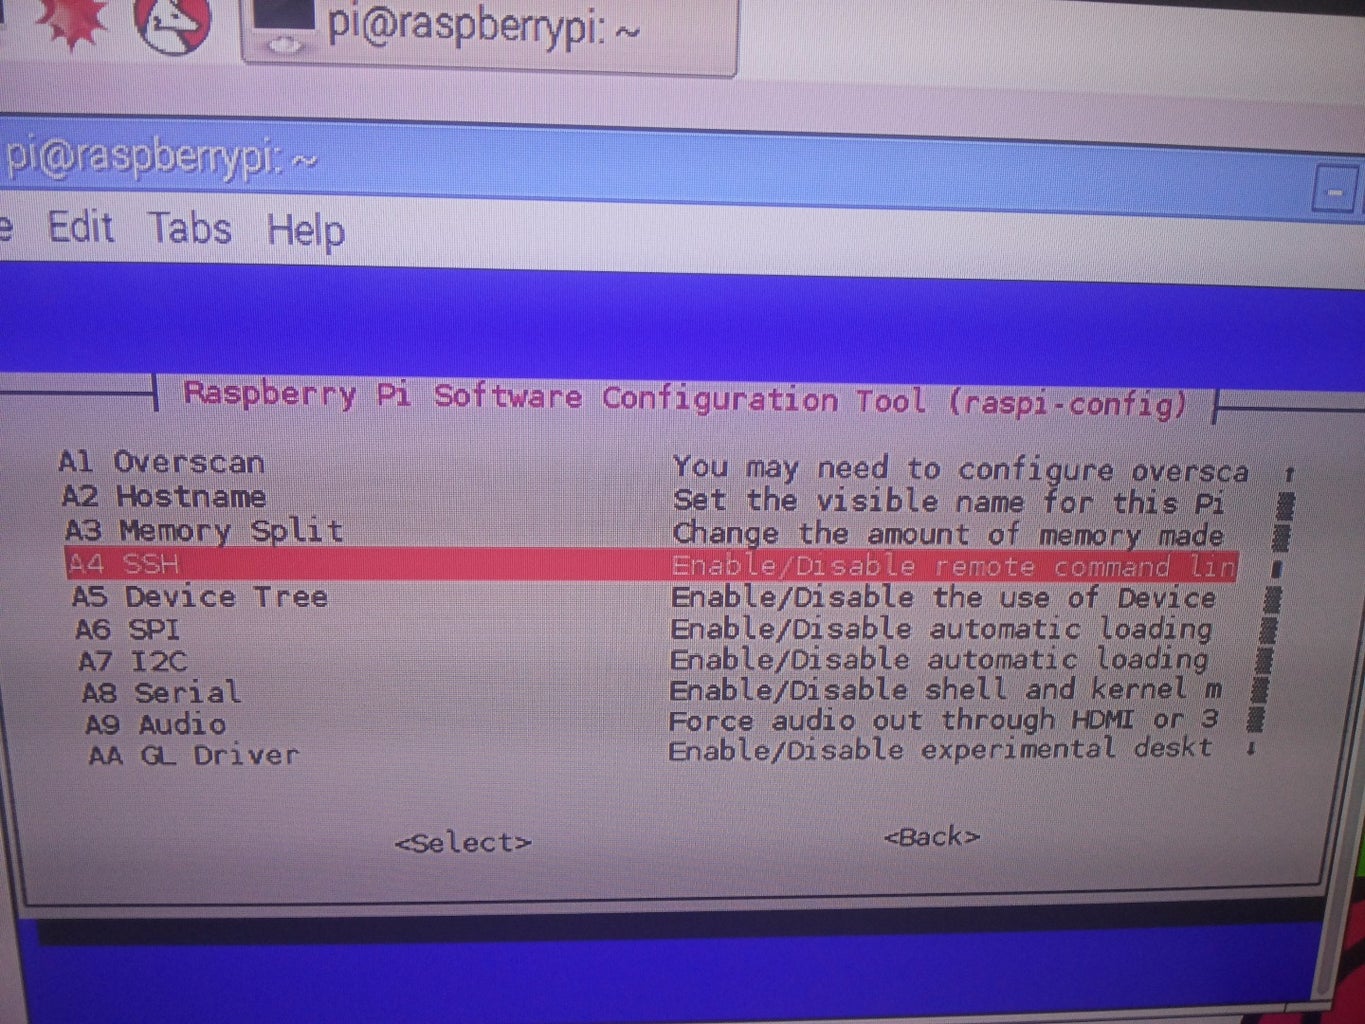
Step 1: Enable SSH
By default, SSH may be disabled on your Raspberry Pi. To enable it, navigate to the Raspberry Pi Configuration tool and select the "Interfaces" tab. Enable SSH and reboot your device.
Step 2: Secure Your SSH Configuration
Modify the SSH configuration file to enhance security. Use the following commands:
sudo nano /etc/ssh/sshd_config
Consider disabling root login and changing the default SSH port for added security.
Integrating VPC with Raspberry Pi
Integrating your VPC with your Raspberry Pi involves connecting your device to the VPC network and ensuring secure communication. Follow these steps:
Step 1: Connect Your Raspberry Pi to the VPC
Assign a private IP address to your Raspberry Pi and ensure it is part of the VPC subnet. Use the AWS Management Console or CLI to configure this.
Step 2: Test the Connection
Use the ping command to verify connectivity between your Raspberry Pi and other devices within the VPC.
Securing Your RemoteIoT Setup
Security is paramount when setting up a RemoteIoT VPC SSH Raspberry Pi environment. Here are some best practices:
Use Strong Passwords and Keys
Ensure that all accounts, including SSH keys, use strong and unique passwords. Regularly update these credentials to prevent unauthorized access.
Implement Firewall Rules
Configure firewall rules to restrict access to only necessary ports and IP addresses. This minimizes the attack surface of your network.
Troubleshooting Common Issues
Even with careful planning, issues can arise. Here are some common problems and their solutions:
SSH Connection Refused
If you encounter an "SSH connection refused" error, check the following:
- Ensure that SSH is enabled on your Raspberry Pi.
- Verify that the correct IP address and port are being used.
- Check firewall rules to ensure they allow SSH traffic.
Conclusion and Next Steps
In conclusion, mastering RemoteIoT VPC SSH Raspberry Pi requires a solid understanding of each component and how they work together. By following the steps outlined in this guide, you can create a secure and efficient remote access solution for your IoT devices.
We encourage you to share this article with others who may benefit from it and leave a comment below if you have any questions or feedback. For further reading, explore our other articles on IoT, cloud computing, and network security.
Remember, staying informed and continuously improving your skills is key to success in the ever-evolving world of technology. Happy tinkering!